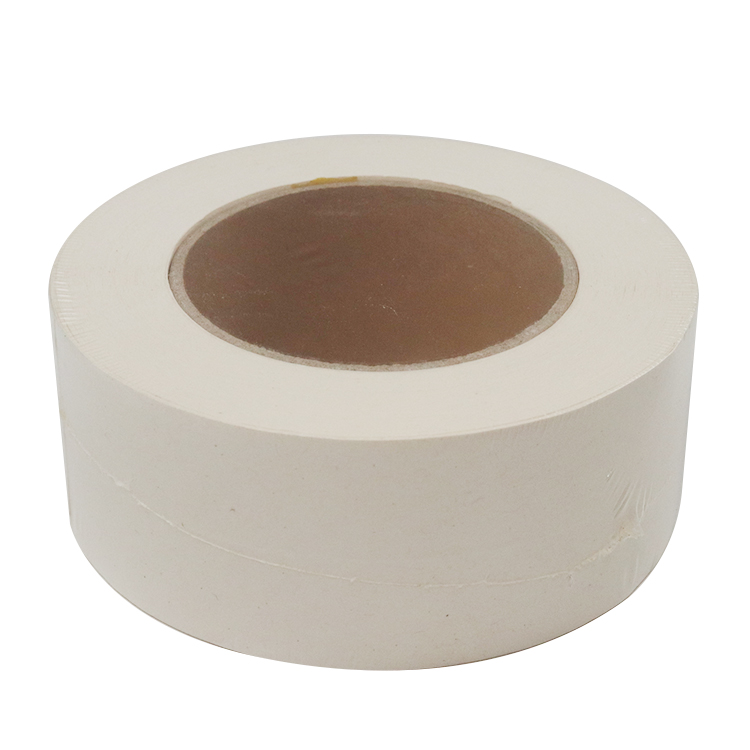
Paper vs. Mesh: Pag-unawa sa Mga Uri ng Drywall Joint Tape
Mga pangunahing pagkakaiba sa pagitan ng paper tape at fiberglass mesh tape
Ang regular na papel na joint tape ay karaniwang binubuo lamang ng mahigpit na tinagpi na papel na kailangang ilibing sa joint compound upang maayos na dumikit. Ang mesh tape ay mayroon nang nakadikit na fiberglass grid kaya't agad itong nakakagrab sa drywall nang hindi nakakabulala. Karamihan sa mga 'weekend warrior' ay mas madali ang mesh sa pagtrabaho sa mga tuwid na seams, samantalang ang paper tape ay nangangailangan ng kaunting pagsasanay ngunit nagbibigay ng mas makinis na resulta kapag maayos ang paggawa. Ang mesh ay may bukas na pattern ng weave na nagpapahintulot sa compound na tumagos at magbond nang maayos, samantalang ang papel ay bumubuo ng isang matibay na layer na hindi gaanong umaangat. Iyon ang dahilan kung bakit ang mga propesyonal ay mas nagpapabor sa papel sa mga kritikal na lugar kung saan ang flatness ay mas mahalaga kaysa sa flexibility.
Paghahambing ng pagganap: pagdikit, tibay, at paglaban sa pagbitak
Ang mga pamamaraan ng pagdikit ay lumilikha ng natatanging profile ng pagganap:
- Papel na tape bumubuo ng mas matibay na monolithic bond kapag maayos ang pagkakalagay, na nagpapababa ng 40% na posibilidad ng pagbitak sa mga structural seams ayon sa mga pamantayan ng drywall industry (2025)
-
Mesh tape nag-aalok ng agarang pagkapits angunit umaasa sa pagbabad ng komponen para sa matagalang pagkakahawak
Nagpapakita ang pagsubok sa tibay na ang papel ay higit na mahusay kaysa sa mesh sa mga mataas na stress na sulok at butt joints dahil sa hindi elastic na kalikasan nito. Gayunpaman, ang mesh ay nagbibigay ng higit na lumalaban sa kahalumigmigan sa mga maruming kapaligiran tulad ng mga banyo, binabawasan ang panganib ng amag ng hanggang 60% kumpara sa papel (pag-aaral sa materyales sa gusali 2024). Ang lumalaban sa pangingisay ay pabor sa papel para sa mga permanenteng pag-install, samantalang ang mesh ay angkop para sa pansamantalang pagkukumpuni.
Kailan gagamitin ang papel na tape o kisi na tape sa iba't ibang kapaligiran
Pumili ng papel na tape para sa mga aplikasyon na mataas ang stress:
- Mga structural seams at sulok na napapailalim sa paggalaw
- Mga propesyonal na tapos na nangangailangan ng napakakinis na surface
- Mga indoor na kapaligiran na may matatag na temperatura
Pumili ng kisi na tape sa:
- Mga lugar na madaling maapektuhan ng kahalumigmigan (mga banyo, kusina, silid sa ilalim ng lupa)
- Mga proyekto sa bahay na nangangailangan ng mabilis na pagkakahawak
- Mga instalasyon ng tile backer board na nangangailangan ng paglaban sa amag
- Mabilis na pagkukumpuni kung saan pinipili ang kaunting paghahanda
Ang papel na tape ay nagpapanatili ng integridad sa mga magkasanlan na nagtatag ng karga, samantalang ang mesh ay umaangkop sa maliit na paggalaw ng substrate sa mga hindi pang-istrakturang aplikasyon.
Karaniwang maling kaisipan tungkol sa mga uri ng drywall joint tape
Karamihan sa mga tao ay naniniwala na ang fiberglass mesh ay mas mahusay kaysa sa karaniwang papel pagdating sa lakas, ngunit minsan ay nangyayari ang kabaligtaran. Dahil sa sobrang taglay nitong kakayahang umangkop, maaaring talagang mapahina ng fiberglass ang mga butas sa mga istraktura na kailangang matibay at matatag. May isa pang karaniwang maling akala - naniniwala ang iba na mas madali ang pagtratrabaho sa mga sulok gamit ang mesh. Hindi totoo iyan! Mas madaling makabuo ng malinis at matalim na sulok ang papel na tape dahil mas madaling maipalit, na walang pangangailangan ng espesyal na kagamitan. Tungkol naman sa mga bula? Maraming tao ang naniniwala na napipigilan ng mesh ang mga ito, ngunit kung hindi tama ang paglalapat, parehong mattrap ang hangin sa ilalim ng parehong materyales. May mga pagsubok mula sa industriya na nagpapakita ng isang kawili-wiling bagay. Ang simpleng papel ay may mas magandang paglaban sa mga bitak kaysa sa mesh, kahit pa ang itsura nito ay pangkaraniwan lang. Ito ay salungat sa iniisip ng karamihan ngayon, kung saan naniniwala ang lahat na ang sintetiko ay laging mas mabuti kaysa sa mga tradisyonal na ginawa.
Paano Pumili ng Drywall Joint Tape Ayon sa Antas ng Kasanayan
Mga opsyon na friendly sa nagsisimula: bakit ang mesh tape ay madalas inirerekomenda
Ang fiberglass mesh drywall joint tape ay nagpapaginhawa sa buhay ng mga taong baguhan dahil sa nakakabit na likod nito at sa paraan na mapagpatawad ito sa paglalapat. Ang paper tape ay nangangailangan ng maraming layer ng putty muna, pero ang mesh? Ilagay mo lang agad sa ibabaw ng mga butas. Ang maliit na grid pattern ay nagpapahintot ng mga bula ng hangin habang inilalapat, na nagbabawas sa mga pagkakamali na madalas gawin ng mga nagsisimula. Ang Home Depot ay nagkaroon ng pagkakataong magtest noong kamakailan na nagpapakita na ang mga mesh tape ay maaaring mapabilis ang trabaho habang kailangan pa ng kaunting kagamitan. Tandaan naman, lalong sumisigla ang mesh kapag kasama ang mga ready-made compound mixes, lalo na mainam sa pagreresolba ng maliit na butas o bitak kung saan hindi gaanong mataas ang pressure.
Mga advanced na teknik gamit ang paper tape: eksaktong sukat at kontrol sa feathering
Karamihan sa mga bihasang drywall pros ay naniniwala sa papel na tape dahil ito ay mas matibay at nagbibigay ng napakalinis na tapos na resulta na hindi mo mapapansin pero lahat ay nagkakomento. Ang double knife trick ay nangangailangan ng maraming pagsasanay. Magsimula sa isang magaan na layer ng joint compound, ilagay ang tape sa lugar na kinakailangan, pagkatapos ay gamitin ang isang 6 na pulgadang kutsilyo habang inaalis ang labis na lama. Ang papel ay gumagana nang maayos dahil hindi ito sumisipsip ng compound tulad ng mesh, na nagpapahintulot sa atin na makagawa ng napakagandang feathered edges na halos hindi nakikita ng mata. Mahusay ito sa mga seams sa kisame kung saan ang stress ay madalas na nagpapakita, ngunit magingat sa antas ng kahaluman ng compound o bubuo ang mga bula at masisira ang lahat pagkatapos ng pagkatuyo.
Kagamitan at pagkakatugma ng compound ayon sa antas ng karanasan
| Antas ng Kakaaranasan | Inirekomendang Tape | Uri ng Compound | Mahahalagang Tool |
|---|---|---|---|
| Nagsisimula | Lamesa ng Fiberglass | Pre-mixed all-purpose | 6" knife, utility knife |
| Advanced | Papel | Setting-type (45-90) | 6" + 10" knives, corner tools |
Ang mga baguhan ay makakahanap ng mabuting kinalabasan sa paggamit ng mesh tape kasama ang mga compound na dahan-dahang natutuyo dahil nagbibigay ito ng karagdagang oras para maayos ang mga bagay kung kinakailangan. Ang mga propesyonal naman ay pumipili ng mabilis na humuhulma na compound kasama ang paper tape kapag kailangan nilang matapos at mapapakinis ang lahat sa parehong araw. Upang makuha ang pinakamahusay na resulta sa paper tape, isang anggulo na taping knife na nasa 10 hanggang 12 pulgada ang haba ay talagang nakakatulong upang makagawa ng maayos na transisyon. Hindi naman kailangan ng anumang magarbong kagamitan para sa mesh tape - karaniwang sapat na ang isang 6-pulgadang kutsilyo. Habang pipili ng mga kagamitan, tandaan na ang mas malalaking blade ay may posibilidad na magbigay ng mas magandang resulta para sa mas malalaking joints. Ang mas malawak na kutsilyo ay nakakatulong na mas mapakinis ang transisyon sa pagitan ng mga bahagi kumpara sa mga maliit na kutsilyo.
Mga Tip ng Eksperto para sa Isang Makinis na Resulta gamit ang Drywall Joint Tape
Tamang pamamaraan ng paglalapat upang maiwasan ang mga bula at pagkabulok
Magsimula sa pamamagitan ng pagkalat ng isang mabuting manipis na layer ng compound sa lugar ng butas, pagkatapos ay ilagay ang drywall joint tape sa itaas. Gamitin ang karaniwang 6-pulgadang taping knife upang pindutin nang matigas ang tape pababa sa compound. Gawin mula sa gitna papalabas upang hindi mahuli ang mga hindi gustong hangin sa ilalim. Panatilihin ang matibay na presyon habang gumagawa ngunit magingat sa paghila nang labis sa tape dahil ito ay magbubunga ng mga pangit na kulubot sa huli. Karamihan sa mga propesyonal ay sasabihin sa sinumang makinig na ang pagkuha ng tama sa pagkakalagay ay nakakatigil ng halos 80 porsiyento ng lahat ng mga nakakainis na problema sa butas sa hinaharap. Huwag kalimutan tanggalin ang anumang sobrang compound na nasa ilalim ng tape habang basa pa ito at madaling maayos, kung hindi ay ang mga maliit na gilid ay mabubuo at masisira ang kabuuang itsura.
Mga estratehiya sa pagbuhos at paglalayer para sa walang putol na mga butas
Mga mas magandang resulta ang nagmumula sa paglalapat ng ilang manipis na layer kesa isang makapal na layer. Hayaang tuyo ang bawat layer bago magpatuloy, karaniwan ay mga 24 oras ay sapat na. Upang makakuha ng maayos na transisyon, kunin ang 10 hanggang 12 pulgadang putty knife at i-feather ang mga gilid sa mga 30 digri anggulo, siguraduhing lumampas ng mga dalawang pulgada sa bawat bagong layer na ilalapat. Ang pag-sasand ay dapat gawin nang maingat gamit ang 120 grit na papel, gamit ang magaan na presyon sa mga maliit na bilog kesa sa matinding paggalaw pabalik-balik. Magingat sa labis na pag-sasand dahil ito ang nagiging sanhi ng karamihan sa mga problema sa mga nakalantad na bahagi ng tape. Saktan lamang ang mga talagang mataas na lugar nang hindi masisira ang magandang feathered blend na ating ginawa. Kapag tinatrabaho ang mga butt joints kung saan walang likas na pagtaper, ang paggawa ng tatlong hiwalay na layer ay karaniwang pinakamabuti dahil ito ay tumutulong upang itago ang mga tuwid na linya sa pagitan ng mga surface.
Gamit ang tamang joint compound kasama ang napiling uri ng tape
Mahalaga na iugnay ang tamang compound sa uri ng tape at sa yugto ng proseso na iyong ginagawa kapag nagtatrabaho sa drywall. Gamitin ang karaniwang all-purpose compound kapag nagsisiksik ng paper tape, samantalang ang lightweight topping compound ay pinakamahusay para sa huling mga layer sa ibabaw ng mesh tape. Ang ilang setting-type compounds, na karaniwang tinatawag na hot mud, ay makatutulong upang mapabilis ang gawain sa mga bahay na may kahalumigmigan ngunit dapat ilapat nang mabilis bago ito magsimulang lumambot. Ang mesh tape ay nangangailangan talaga ng mga produktong ito na mabilis ang setting upang maiwasan ang mga nakakabagabag na bitak dahil sa pag-urong na maaaring mawasak ang oras na iyong inilaan. Huwag kalimutang suriin kung ano ang sinasabi ng tagagawa tungkol sa oras ng pagpapatuyo sa pagitan ng bawat layer. Ang pagmamadali sa proseso sa pamamagitan ng paglalapat ng isa pang layer nang masyadong aga ay nakakapigil ng kahalumigmigan sa ilalim at magdudulot ng pagbuo ng mga bula sa huli.
Paraan sa pag-iilaw at inspeksyon upang mapansin nang maaga ang mga imperpekto
Nang maghahanda na para sa huling pagpapakinis, matalino na una nang mag-ayos ng direksyon ng ilaw sa paligid ng mga pader. Ang mga halogen na ilaw na nakapatong sa matulis na anggulo ay talagang makatutulong upang makita ang mga nakakabagabag na guhong at mga linya ng tape na parang nawawala sa ilalim ng karaniwang ilaw sa silid. Kailangan ding suriin ang mga bagay sa iba't ibang yugto. Tumingin nang mabuti pagkatapos ilagay ang tape upang makita ang mga bula ng hangin na nakatago doon. At muli pagkatapos ilapat ang pangalawang layer, bantayan ang mga problema sa feathering. At siguraduhing magsagawa ng huling pag-check bago magsimula ang pagpaprima. Mayroon bang mga nakakubling sulok? Ilaw ng flashlight mula sa antas ng sahig pababa upang makita kung saan hindi pantay ang paglalagay ng kahuti. Kunin ang lapis at markahan ang mga problemang lugar upang hindi mawala sa gitna ng ibang gawain.
FAQ: Drywall Joint Tape
Ano ang pangunahing pagkakaiba sa pagitan ng papel at mesh na drywall tape?
Ang paper tape ay nangangailangan ng pagkakalubog sa compound, nag-aalok ng mas magandang paglaban sa pagbitak at nagtatapos nang mas makinis. Ang mesh tape ay madaling dumikit at nagpapahintulot ng mabilis na aplikasyon, na nagpapagawa itong angkop para sa mga baguhan sa mga proyekto sa bahay.
Kailan ko dapat gamitin ang paper tape kaysa mesh tape?
Gamitin ang paper tape para sa mga mataas na stress na lugar tulad ng mga structural seams at sulok. Ang mesh tape ay mas angkop para sa mga lugar na may posibilidad ng kahaluman tulad ng mga banyo at kusina.
Talaga bang mas madali ang mesh tape para sa mga baguhan?
Oo, ang mesh tape ay madalas inirerekomenda para sa mga baguhan dahil sa kahalagahan ng aplikasyon nito at kakayahang makatulong na maiwasan ang mga bula ng hangin, lalo na kapag ginamit kasama ang mga handa-ng-gamitin na compound.
Maari bang gamitin ang mesh tape sa halip ng paper tape sa lahat ng drywall seams?
Hindi, habang ang mesh tape ay kapaki-pakinabang para sa mabilis na pagkukumpuni at hindi gaanong kritikal na mga lugar, ang paper tape ay pinipili para sa mga structural seams na nangangailangan ng lakas at tibay.